
If you purchase an independently reviewed item through our site, we earn an affiliate commission. Read our affiliate disclosure.
Harvesting your own honey is a magical experience. The ups and downs that you go through from the start of beehive selection, hive placement, constant monitoring, and many other activities associated with beekeeping, will all be worth it once you get your first harvest. Honey is a commodity that is seemingly always in demand, and its health benefits can never be emphasized enough. The current era where people are keen on what goes into their bodies has catapulted even more the demand for pure honey. It can be sold bottled or broken down into honey-filled comb pieces that are ready for sale. Honey bee products such as beeswax, royal jelly, and pollen are also in high demand and are sold by beekeepers just the same. In this article, we offer helpful insights on how to package honey, as well as label and transport it.
How to Package Honey
Every beekeeper you will come across will take seriously every drop of honey. This virtue becomes instinctively engraved in them with time. Experience will teach you how much work goes into what we consider the most precious product. The labor put into it, added to what bees have to go through for an entire season, greatly enhances the value placed on honey. It, therefore, requires proper handling, packaging, transportation, and storage.
Packaging is an important step in the chain before honey ends up on the stores or consumer table. Honey should be packaged with love, care and most of all compliance with local food safety regulations.
NOTE: Beekeepers should be careful to only harvest surplus honey, and leave an ample amount of honey for the colony to feed on. Those living in countries that experience winter should not harvest honey in the first year of the beehive being set up.
Post-Harvesting
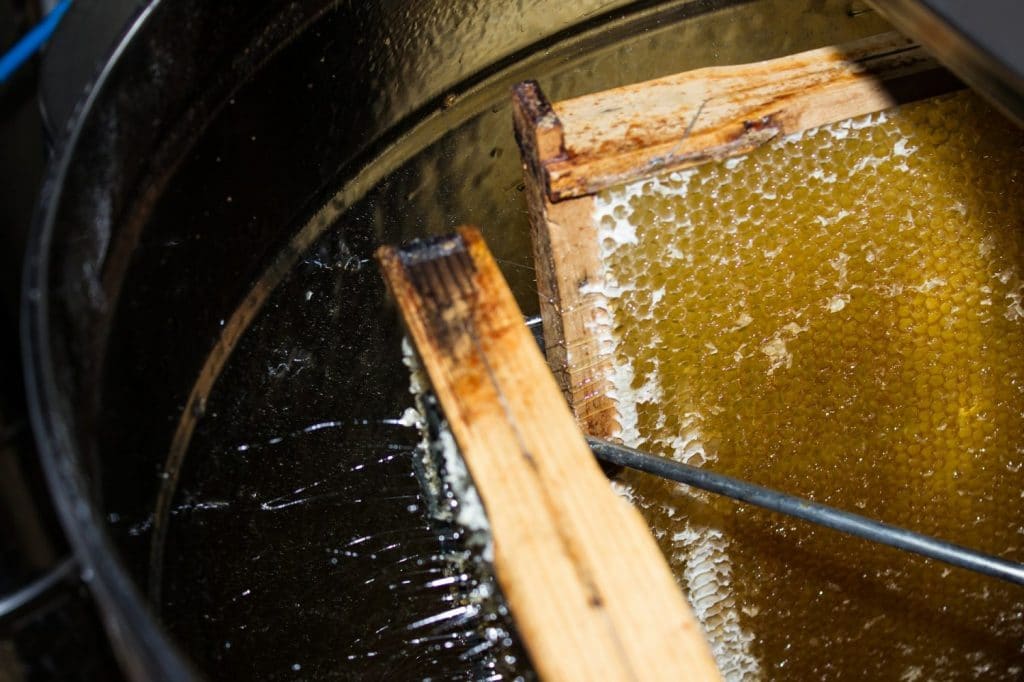
Honey is harvested and then subjected to the extraction process. You need a honey extractor in order to get the liquid gold. Some beekeepers may choose to sell the honey without extracting it but very few do so. The use of honey extractors is a popular option that offers a win-win situation between the beekeeper and the bees. It makes it possible to recycle honeycombs that would otherwise become damaged and rendered useless in other forms of extraction. This saves time and energy for the bees, allowing the worker bees to channel their energy to other important tasks within the colony instead of building fresh honeycombs. The beekeeper will ultimately enjoy more productivity from the honey bees.
NOTE: It takes s honey bee colony at most between 1 to 2 months to make honeycombs. Strong bee colonies can build 10 frames within 3 days but weak colonies will take much longer. The weather conditions, colony type, and nectar flow affect how fast honey bees can build comb.
Extracted honey requires temporary storage in a food-grade plastic bucket. Choose one with a honey gate or buy one, then DIY the honey gate. It is important that you ensure the honey gate is tightly closed so as to avoid honey leakage.
Plastic buckets make honey bottling so much easier. You can also consider stainless steel honey storage tanks. Extracted honey should be allowed to settle for a period of between 24 to 48 hours, after which bottling begins. It is important to do so since wax debris tends to mix with honey during extraction. This will float when the honey is left to settle. The waiting period also helps release air bubbles that may lie inside the extracted honey. Wax can then be removed by filtering or skimming leaving behind the clear golden honey.
There are also some other factors that need to be considered that will dictate how long the honey should stay before bottling: temperatures, the crystallization process, and the types of filters used. Cool temperatures extend the period it takes for long air bubbles and wax debris to come to the top. This, therefore, means it may require more time before bottling when prevailing temperatures are too low. The crystallization property of honey and prevailing temperatures are aspects that are beyond your control as the beekeeper. Honey nectar and the ratio of glucose to fructose affect how fast honey can crystallize.
Filtering Honey
The type of filters also dictates how long you can take before bottling. Excellent quality filters will sift most of the wax debris, leaving behind some foam that can easily be skimmed. This will mean you can bottle your honey within the shortest time. This will not happen if you use poor-quality filters.
Improper packaging post-extraction can clearly be identified by a keen eye. You will notice some white foam or air bubbles at the top of the honey jar. A white frost can also be seen and this will spread down to the jar’s interior, making the honey appear white in color. This may not affect the quality of your honey but it certainly drives away buyers.
In most cases, some beekeepers can extract the honey on the first day and bottle it the following day. Others will leave the honey to settle for a week or more before bottling. It all depends on the equipment used, temperatures, type of honey, and individual preference.
NOTE: You may have the best filters and still end up with honey that has some air bubbles and foam. To avoid this, tilt the bucket a little bit when draining the honey into jars. Fill the jars slowly as well and this will help avoid sucking the bubbles into the bottled honey.
You also need to use several filters when extracting honey, with the most common being the 400-micron and the 600-micron filters. These should be used in combination so as to completely remove debris, tiny wax, and bee parts from the honey. Well-filtered honey looks very clear and attractive when kept in glass jars.
An important point to also remember is to use food-grade plastic buckets. This will ensure the honey is not contaminated. Also, keep the honey in tightly-sealed bottles to keep off moisture. Honey is hygroscopic and that means it attracts moisture from the air.
Bottling Honey
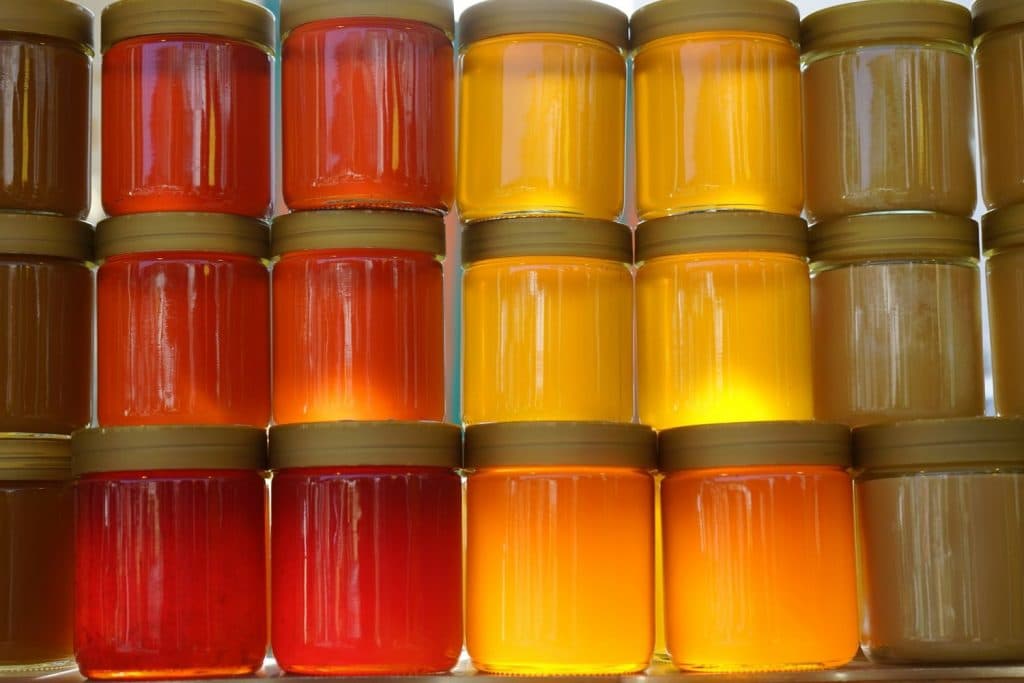
This is an important step in the honey-selling chain. The kind of bottles used can make or break your business. Clear containers are highly recommended since honey looks attractive in them. Glass bottles are best suited.
Local regulations also dictate what should be or not be used for honey bottling and storage. So ensure you read through the regulations.
Using Food Grade Items
You may also use food-grade plastic bottles but not all are free from chemicals. A clear understanding of what food safe and food grade really means will come in handy at this point. Any food-grade plastic can be defined as food-safe plastic. That means it is plastic that is ideal for consumable food or drinks. The resin identification code (also referred to as the recycling number) can help ascertain whether what you are buying is food safe or not. This is represented by a triangle or arrows that surround numbers that range from 1 to 7. Any food-grade plastic is represented by numbers 1 through 7. Some of the main characteristics of food-grade plastics include their superior dimensional stability, excellent resistance to wear, and high flexural modulus and strength.
Checking for Moisture
It is important to check the moisture content prior to bottling. A decent refractometer will come in handy in this case. Moisture can quickly spoil honey under storage. The right moisture percentage is between 17 to 18 per cent. Any deviation from this can cause the stored honey to ferment or spoil.
Storage Options for Honey
Some of the options you can choose from when it comes to packaging and storing honey include the following:
1. Mason jars
Well-made old-fashioned mason jars are at the top of the list of the most used jars. They are not only cheap but also come in the right size, making it possible to easily package and store harvested honey. These jars can also heat up easily, making it so much easier to restore crystallized honey. They are perfectly suited for everyday and long-term storage. You can also recycle mason jars which are thus more sustainable.
2. Half and one-gallon glass containers
These are also helpful when it comes to packaging and storing honey after harvesting. The one-gallon jars are heavier and least suitable since they may not be safe enough to keep. The half-gallon jars are lightweight and much safer and hence the best choice for storage. These jars are easily available and come cheap at any local store.
3. Stainless steel drums
These are best suited for long-term storage of honey. They are available in various sizes and are ideal for the large-scale honey producer. The alternative to these drums is plastic buckets. These are ideal if the chosen container is food grade. It should also have a wide opening so as to make it easy to scoop honey when it crystallizes. Ideal drums for storage should never add flavor to honey, have a barrier between the metallic surface of the drum and the honey, and should be resistant to peeling and flaking.
Sterilization
These honey bottles will never require sterilization given the fact that honey by itself is an antimicrobial food. This is a property that makes it so much easier to bottle and store honey for a long time. It also ensures honey does not spoil even when kept for years. Plastic and glass bottles only need to be cleaned thoroughly before storage.
Bottles made specifically for honey storage do not require any cleaning before bottling the honey. However, you can clean them using the dishwasher (glass jars and not plastic jars) if they have been exposed to dirt.
Sealing
As for sealing, honey bottles do not require special sealing or what may be referred to as vacuum sealing. All that is needed is the usual caps that come with the bottles. You should however ensure you purchase bottles that are specifically made for bottling honey. Such bottles easily fit making it impossible for honey to leak. Honey should be stored in airtight glass jars and kept in a cool and dry place. It should not be exposed to direct sun or any heat-generating appliance.
Warmth
Some slight warmth may be required during honey extraction, filtering, and storage. This will make honey filtration much easier. It will also minimize the possibility of crystallization. The ideal temperature level for honey storage is between 32 to 38 degrees Celsius. This will prevent the honey from crystallizing. It is worth noting that crystallization is normal and will not affect the ingredients in honey. Crystallization can be reversed by subjecting the honey to some slight warmth. Exposure to the sun can also help restore its texture. You can also drop the sealed honey jar into a container with hot water and let the crystals dissolve.
Some large commercial enterprises pasteurize honey at 65 degrees Celsius in order to extend its shelf life and prevent the honey from crystallizing. This may look ideal but it takes away the honey’s natural properties such as enzymes, aroma, color, and flavor. Such honey is never considered raw and should not be labeled as raw. The best way of packaging honey is by putting fresh honey straight from honeycombs into storage jars before it can crystallize.
Honey Extraction and Bottling Area
Local guidelines apply when it comes to the required standards of honey processing plants. The building and its surroundings should adhere to set guidelines. Some of these include:
- The honey extraction site and its surrounding area should be free from dust, questionable odors, smoke, and any other contaminants.
- There should be sufficient space for storage and working without overcrowding equipment or workers within the site.
- The area should be clean and sterilized.
- Processing and storage areas should not harbor contaminants and should be impervious. It should not have cracks, crevices, or pits.
- It should be well-secured and protected from insects, rodents, and birds. Any potential access points for these intruders should be completely sealed.
- The honey extraction site should not be exposed or contain corrosive substances that may come into contact with equipment or honey.
- The site should have a good design to make the cleaning and movement of equipment and personnel hassle-free.
- The area should be well-ventilated and have proper lighting. The ideal temperature levels for honey processing and storage should be maintained within the premises so as to keep honey in good condition.
- Honey processing equipment should be durable, and resistant to corrosion, flaking, abrasion, chipping, and flaking. It should also withstand heat, honey, and water.
How to Label Honey
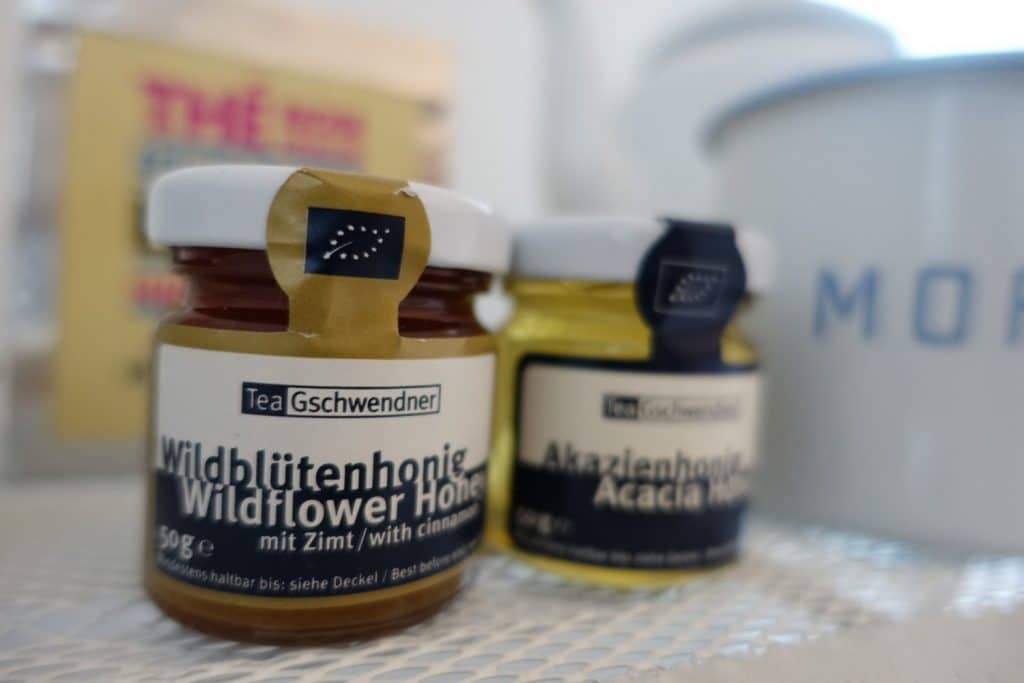
Honey labeling may be necessary for a number of reasons. First off, anyone who wants to sell their honey out of their home, in a local food store, or at the farmer’s market needs to properly label their product.
There are specific guidelines set by authorities regarding labeling and one should familiarize themselves with them. You can also check out your county extension office for any other requirements that apply to your locality. Google is also an important tool that comes in handy since it is full of helpful information regarding honey labeling specific to your location.
NOTE: In the United States, the FDA requires specific information on labels. First off, is the name of the food; which in this case is honey. You can label as honey if it is raw honey. If it has any additives such as corn syrup then do not label it as honey. Secondly is the net weight which refers to the weight of the honey less the container. This should be expressed in both metric and imperial units. Finally, contact information. This will include the name of your business, contacts, address, your website, email address, and any other information.
Attractive labels that look professional will stand out and it will not cost much to have one. You can hire a freelance graphic designer to come up with a good one for you. An excellent label will make your product stand out irrespective of whether you are selling or gifting your honey. You can also use premade labels.
You can also consider getting a customized rubber stamp for your business. This is an economical choice that will only require some ink for the rest of its service life. You can choose an excellent design from a local seller. Be keen on what message is embedded on the rubber stamp. Choose a label that perfectly describes your business.
Another great way of coming up with a unique label is by DIY. You can use locally available materials to make adorable rustic labels or even decorated honey jars.
How to Transport Honey
First things first; you need to transport the honey from the apiary to the extracting room. Any vehicle that will be used for the job needs to be prepared the previous day, to ensure proper hygiene is observed. Such a vehicle should be free from toxic residue or any other product that may have some strong odor. As such, it shouldn’t have been involved in transporting such a product within the period.
The surface of the vehicle used for transporting honey should have non-toxic material as its cover, be cleaned thoroughly, and should not have any impurities. This will ensure the honey supers are not contaminated during transportation.
If using open-load vehicles, then cover honey supers with canvases so as to avoid contamination. Substances such as dust, debris, and engine combustion residues can contaminate honey if exposed. Canvas covers will also keep off bees that may trail and devour the honey being transported. Therefore, ensure you cover the floor of the vehicle and the upper surface of the honey supers.
It is also important to keep the vehicle under a shaded area when loading honey supers into the vehicle. Direct sunlight should be avoided as much as possible since it negatively affects the honey quality. You can use a hive cover as an accommodation load at the bottom canvas. Supers should always be covered by canvas until the product reaches its final destination.
Ensure the supers are well-tied also during transportation. This will secure the product in place whenever the vehicle brakes abruptly. It will also ensure the honeycombs do not break during transportation. The driver should also be advised to drive the vehicle slowly and with utmost care.
Transported honey frames can be stored for 2 to 3 days at most before honey is extracted from the capped cells. Nevertheless, the honey frames should remain properly wrapped during this time so as to keep off pests and bugs. It should also be stored in a secure place that is not accessible to hungry animals. If possible freeze the honey frames.
Conclusion
Honey harvesting, packaging, labeling, and transportation should adhere to some procedures that aim to guarantee the final product maintains its original characteristics and that its quality has not been compromised in the process. Proper packaging is required so as to keep the honey safe and free from contamination and also give it an appealing look when on display at local stores. It is also important to label honey properly so as to make it easier for consumers to identify the product, know its benefits, and also differentiate it from that of your competitors.
Transportation helps deliver the harvested honey safely to the extracting area. If not well conducted, you risk contaminating honey in the process, breaking honey supers, or even alluring raging bees that can attack. Proper handling of honey throughout the facets of harvesting, to the time honey is served on consumer tables is key to successful beekeeping.
[…] popular presentation by sellers. Laws require merchants to declare ingredients of foods they sell. Honey packaging has a list of ingredients that you should read. Look out for additives as a red flag. Added flavors […]