If you purchase an independently reviewed item through our site, we earn an affiliate commission. Read our affiliate disclosure.
Any beekeeper, particularly beginners, would not want to come across burr combs in their beehives. Burr comb is formed out of the spaces that exist between the frames. The spacing should be as even as possible. Moreover, they should be just wide enough to allow for movement of the honey bees between the combs and the hive. This means that it should not be too large or too small.
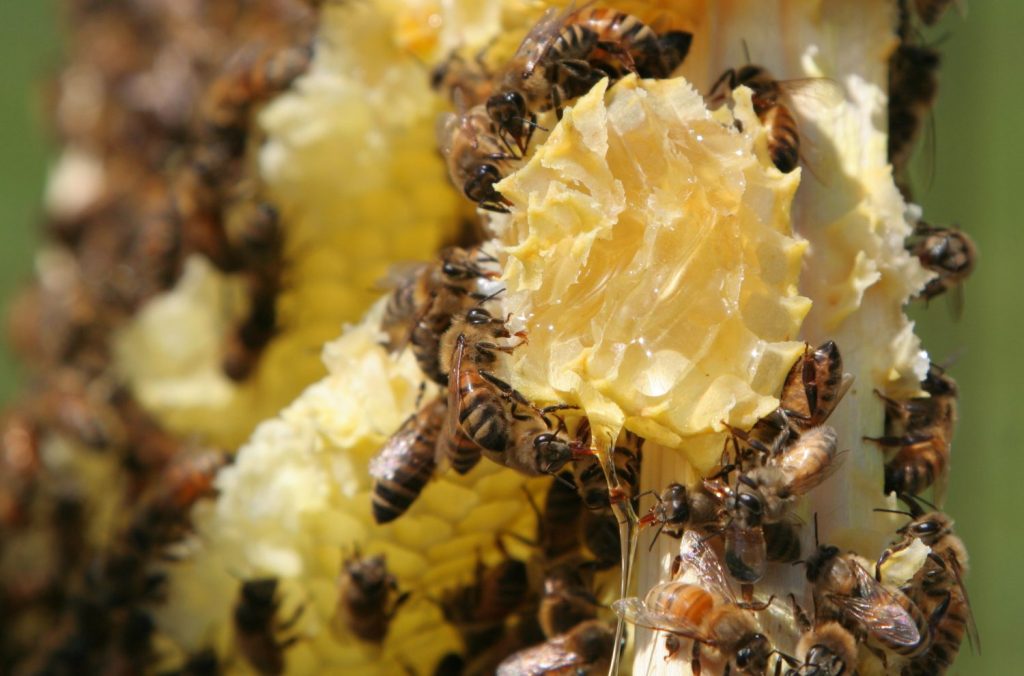
Burr combs connect one frame to a another nearby frame, or one frame to the wall of the beehive. This depends on where the space occurs. This is problematic for the beekeeper since the connected frames cannot be removed easily or safely. This is because the burr comb must first be broken before the frame can be pulled from the hive. This can take a lot of time to correct.
Bee Space
It is important to note that the honey bees are all about their space in the beehive. The honeycomb is like a home to them and its where all their activities are carried out. When the space is too large, the bees will opt to build another honeycomb in the remaining space. This is what we call a burr comb.
Conversely, when the space is too small, bees will seal the gap with a sticky substance called propolis. However, there is a middle ground. Studies have shown that bees will neither seal nor build comb in spaces that are 3/8-inch (approx. 1cm) wide. This is what is referred to as bee space. Honey bees utilize this space as a passageway between two structures, as they navigate their way throughout the hive.
Reasons why Honey Bees Build Burr Comb
There are a few reasons why honey bees would want to form extra combs on top of what they already have in the beehive.
Beekeeper Error
It should be taken into consideration that the burr combs are merely mistakes that a beekeeper makes with his/her beehive. These mistakes could be:
- Not doing prompt inspection of the hives to see if any burr comb is starting to build up.
- Not ensuring that the spacing between the frames are fairly even.
- Forgetting to return a frame that he had removed during the comb inspection.
Incorrect Spacing
Incorrect spacing could also be a major reason for honey bees to build burr combs. Most beekeepers all over the world love to use Langstroth hives. The hive design makes use of the concept of bee space by the use of frames that are placed side by side. This guides the honey bees to where they should build the honeycomb.
When correctly placed, the spaces between the frames are often of the exact size as bee space – 3/8-inch. However, if they are placed incorrectly, then the bees will take advantage of the space to build burr comb. Remember, once burr comb is formed, the beekeeper may have difficultly accessing the hive. since even the top lid will be plastered by these sticky combs.
Misplacing Frames
Burr comb can be built in the space where a frame was removed but not returned. Beekeepers should always remain thoughtful of not forgetting to replace the frames. It can be a huge nightmare when it comes to trying to correct the problem of burr comb.
Issues with Burr Combs
Burr comb can be quite problematic to any beekeeper and this is due to some issues are associated with it. We’ll discuss these issues below.
Difficulty Accessing the Hive
Burr combs are formed from sticky honeycomb. When honey bees form them on top of the frames that are attached to the cap of the super, the hive can become difficult to access. In such an event, the beekeeper would have to first break down the comb in order to get the hive open. Sometimes this can be costly to repair, since it will require a lot of labor and time.
Risk of Losing the Queen
Burr comb can also lead to a risk of losing the queen. Due to this, it is always advisable that while removing the burr comb, the beekeeper should check the combs to ensure that they don’t scratch away the queen. A colony without a queen is at risky since it may lead total collapse. Logically a hive will not survive without the queen since there will be no reproduction, as eggs would not be laid, which is the role of the queen. It is advisable that should this problem occur the beekeeper should always find a way of replacing another queen into the colony.
Time Consuming
Burr combs can also be time consuming, especially during removal. Time is a very important asset to everyone’s life and nobody would want to spend a entire day correcting burr comb. If time is money as they say, then it would be very costly for a beekeeper to spend more than ten hours correcting a mistake that he/she could have have avoided by being observant. The best way to avoid this is to perform consistent inspections; mild burr comb is not such a big deal to the beekeeper as opposed to a massive build up.
Tiring and Irritating
Besides consuming a lot of time, burr combs can also be very tiring and irritating. You wouldn’t want to imagine opening the hive, only to find out that it is filled with burr comb. It is not an easy task having to remove the frames one by one, scratching off the combs with a hive tool, all the while looking out for the queen, and then correctly rearranging the frames back into the hive. This is very tedious work since the removed combs must also be collected and kept for future use. The beekeeper should be very cautious to always correct this problem before it gets out of hand, in order to minimize the time used to correct the problem.
To sum up on the issues associated with burr comb, the beekeeper should always bear in mind that some of these issues arise mainly due to their own mistakes. Consistent checkup on the hives are a great remedy to the problem, since that way it can be corrected in time.
Removing Burr Comb
We are now going to discuss how we can remove burr combs from a beehive. While burr comb does not affect the honey bees, it is very irritating to the beekeeper to have to correct. The beekeeper must therefore find a way of removing the burr comb from the hive in order to avoid further damage.
Steps
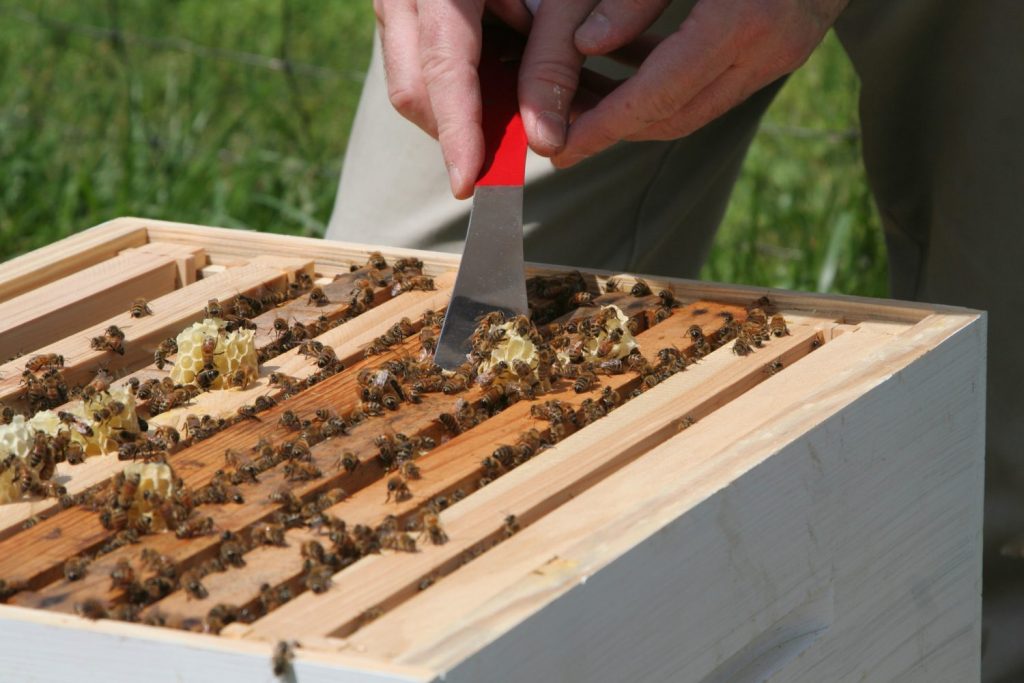
- In order to remove the burr comb, you will require the use of a hive tool.
- After putting on your bee suit, you should first smoke the area to pacify the bees.
- Slowly remove the top of the hive and examine the comb. Whenever you find out that there are some frames that are stuck together, remove the comb that is affected by lifting the frame up.
- Using the hive tool, scratch off the combs from the top of the frames carefully and slowly. Sometimes, the combs may contain larvae and it may be sad news to get rid of them. However you have to do so in order to save the comb and its development.
- After scratching the comb off, if the frames underneath are not affected, you just return the frame to its correct position, ensuring the proper spacing.
Preventing Burr Comb Build Up
Regular hive inspections are crucial to prevent the build up of burr comb. Beekeepers are encouraged to always check on their hives so that they can quickly respond to any problem that may occur before it becomes too messy. It is good practice to use a hive tool to scratch off any burr comb that you recognize during your hive inspections, in order to not let it spread out and get out of hand. While frequent checking may be disturbing to the bees, a quick inspection every four weeks is very recommended, especially for new beekeepers.
Will a Larger Hive Prevent Burr Comb?
A question may arise on whether making a larger hive could be a solution to the problem of burr combs; the answer will be no. Even wild honey bees who form their combs from within a hallow tree trunk, don’t always have to create more space whenever they run out of it. This therefore means that honey bees prefer to maximize production within a small area. We may then draw a conclusion that honey bees needs to use the least possible space to get the greatest use of their resources.
Burr Comb with Larvae
While inspecting burr comb, you might come across some that contain bee larvae. Larvae are eggs of that haven’t already been hatched. Most of these eggs are probably that of drone (male) bees. However this can be a dilemma, since you may be thinking of saving the larvae until they are hatched. Whether to keep them or remove them, still remains a decision that only you the beekeeper can make. However, leaving them to hatch may lead to the bees building even more burr comb, which is clearly something you’d want to avoid.
Allowing the Larvae to Hatch
Firstly, let’s talk about what you should do when you decide to keep the larvae and allow them to hatch before removing the combs.
You may use a plastic frame without foundation in the areas affected. Bees do not like plastic material very much and so they will avoid building comb onto the plastic frames. This way, the larvae will get a chance to hatch in the hive while preventing further burr comb build up.
Removing the Larvae along with the Burr Comb
Secondly, the you may decide to the larvae for fear that the bees may build more burr comb in the hives. Should you decide to do this, there are a number of options available to you:
- You may harvest the larave and use them in fishing. Larvae are source of fish food and can be used to bait the fish.
- The burr combs with larvae can also be used as food for human consumption. They are good appetizer, but only to some people.
- The larvae can be removed and combs can be used in making beeswax, which is quite useful to humans.
In general, when dealing with burr combs, it’s important for the beekeeper to have two things in mind: to save the larvae or to prevent the build up of more burr comb that would later cause havoc. Personally, I’d go with the latter option. As mentioned, most of the larvae are probably that of drone bees, which are without a doubt the least important member of the honey bee colony when it comes to productivity. Removing the burr comb and preventing future headaches should be prioritized.
Burr Comb Uses
In as much as burr combs may be deemed as unwanted by beekeepers, the combs have a wide variety of uses. Safe to say, all beekeepers may not necessarily keep bees for just honey. There are other beehive products that can be harvested such as beeswax. Indeed, burr comb can be melted down to form beeswax. Beeswax is used in making lip balm, waterproofing for shoes, skin creams and many more items as will be discussed below.
Candles and Luminaries
The most common use of beeswax is making candles and luminaries. Beeswax candles burns brighter and removes toxins from the air. Not only that, it gives off a sweet smell after being mixed with essential oils. The procedure for making candles from beeswax is simple and another good thing is that the candle burns for long duration.
Prevent Rusting and Controlling Corrosion
Another use of wax from the bee comb is to prevent rusting of iron materials. Hand tools like shovels, machete, knives, and hoes can be coated with beeswax to prevent them from rusting. This will help in maintaining the tools and keeping them in a more productive state.
Beeswax can also be used to control corrosion. Beeswax prevents bronze materials from getting tarnished by preventing them against oxidation which is due to moist air. All you have to do is to buff on a melted beeswax solution with a towel to form a thin hard coat.
In Hair Products
Beeswax is also used in hair products. It is used in dry hair to start and maintain dreadlocks and as a wax on beards for men. Beeswax is used alongside coconut oil in equal portions and heated before being applied on the hair. The same also works in a mustache to give it a glimmering look effect.
Cheese Waxing
Cheese waxing is also another use of beeswax. It works well for sealing cheese since it has a remarkably low boiling point. If you produce your own cheese, then the best natural cover for your cheese is the beeswax. After the cheese has dried, you apply a hot wax on top of it to cover it up or rather to seal it. Beeswax does not adhere to wet surfaces so the cheese has to be dry.
Other Uses
The uses of beeswax are so many that we can’t talk about all in details. In brief, beeswax can be also be used in:
- Lip balm to moisturize the lips.
- Waterproofing shoes and boots.
- Restoring leather boots.
- Wood lubricants, where it is rubbed onto sliding glass doors or drawers that tend to stick, in order to restore easy and smooth movement.
- Sealing of envelopes is another use of beeswax. The sweet aromatic smell makes it preferable for enveloping invitational letters or letters to our loved ones.
Conclusion
In general for efficient beekeeping, you should ensure that you do all that you can to prevent a build up of burr comb. You should regularly inspect your beehives to confirm that the spacing of the frames are in order and that you haven’t misplaced any of the frames. Indeed, while beekeeping can be fun, it can also be a lot of work, especially when dealing with these unwanted combs.
Have you ever had troubles with burr comb? Let us know what it was like in the comments below.
 BeeKeepClub Resources and Guides for Beekeepers


Thank you very much for the useful Burr Comb information.It is very useful to me.
Yes I have had and I still have problems with burr combs.I have had it on Langstroth,but I most use Kenyan Top bar and its very common in those.
How can I remedy it if its affecting many bars in the hive.I agree with you that my inspection is not that regular,but now that I have the problem,should I start all over removing the bars to correct the problem without losing the colony.
Kind Regards
Joe Mushonga
Hi Joe,
For a top bar hive, it is better crush the comb (along with all the burr comb) to extract the honey.
For Langstroth hives, since you want to preserve the frame, you’ll have to take your time with a hive tool and remove all the burr comb.
[…] other end. This tool is used for various purposes including: prying the beehive lid off, removal of burr comb, separation of supers or boxes, removing debris off the floor board, loosening some hive components […]