
If you purchase an independently reviewed item through our site, we earn an affiliate commission. Read our affiliate disclosure.
The traps used to capture and kill yellow jackets can either be bought from the various manufacturers, or you can make a DIY trap at home. DIY yellow jacket traps have a number of advantages over commercially made and sold traps. This article will guide you on how to make a yellow jacket trap of your choice.
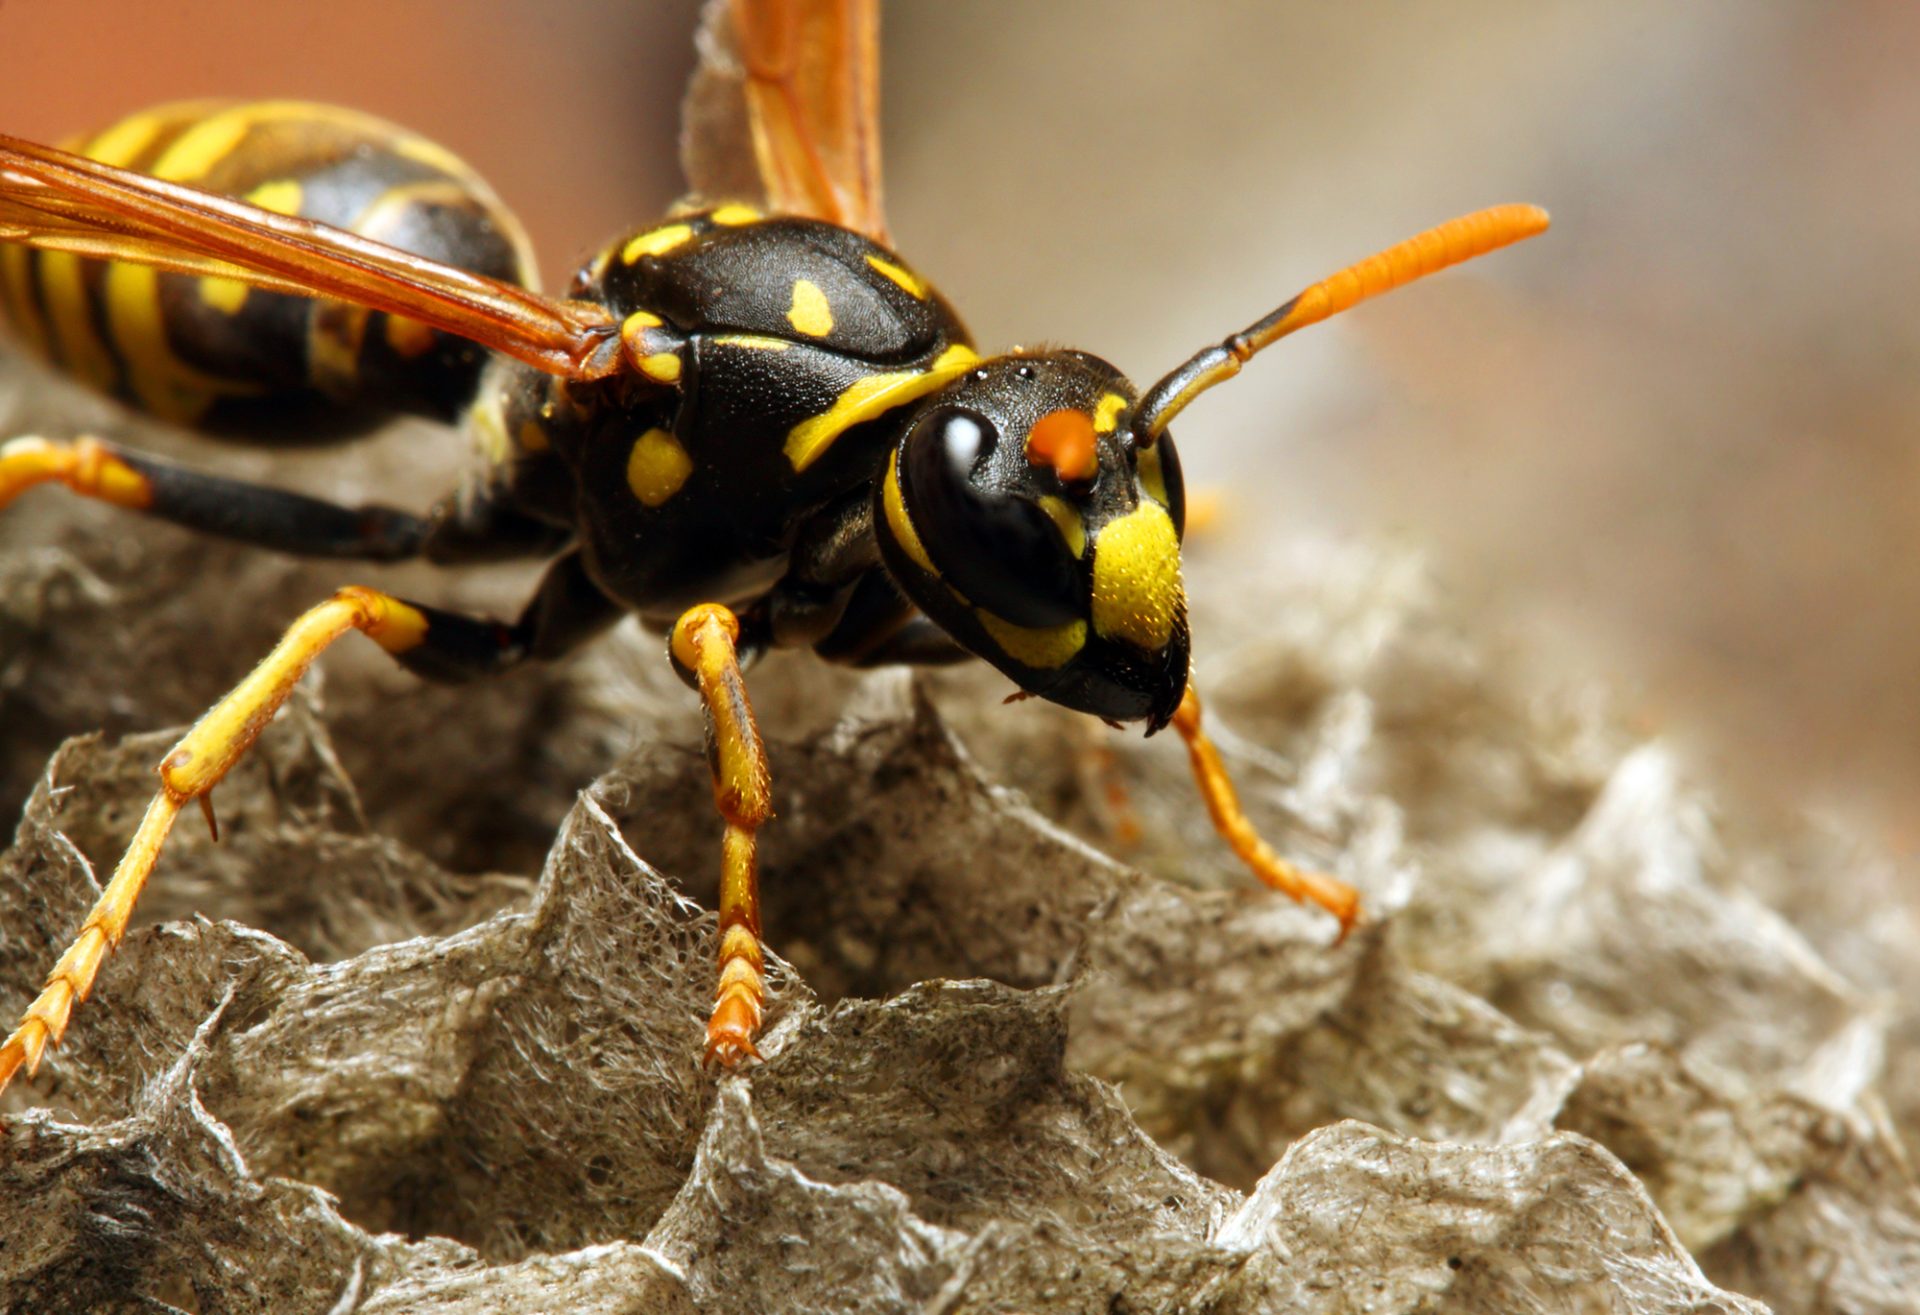
Beekeepers have many pests of honey bees to contend with. In autumn, yellow jackets pose a threat to honey bee colonies. They can lead to losses in beehive products for the beekeeper. A honeybee colony that has suffered a yellow jacket invasion is left without enough honey reserves for overwintering. At worst, yellow jackets invading a beehive will cause the honeybee colony to abscond. This is because the yellow jackets kill many bees in the colony and may take off with larvae of honey bee brood to feed to their yellow jacket larvae.
Please Note:
- Do not trap and kill yellow jackets that are not a threat to your beehives. The foraging radius of yellow jackets is 1,200 feet at most. Yellow jacket nests beyond this range from your beehives pose no threat to your beehives.
- In agriculture and nature, yellow jackets are a natural control for other insect populations. They eat the larvae of other insects and keep the insects from becoming too many in a given area.
Why Yellow Jacket Traps Work
Trapping yellow jackets from spring when they emerge is one of the measures taken by beekeepers to keep the pests under control. By having small populations of yellow jackets, beekeepers are able to reduce the pressure on the wasps have to search for food and protect their beehives from yellow jacket attacks. Yellow jacket queens trapped in spring give greater reduction in populations throughout the year. Catching a few queens makes sure that there are fewer yellow jacket nests in your area. Yellow jackets do not move large distances from the nest to forage. As such, making sure that there are no yellow jacket nests near your apiary is enough to keep honeybees safe from invasions.
Types of DIY Yellow Jacket Traps
There are two major types of DIY yellow jacket traps that you can make. They each utilize locally available materials. These traps are not very difficult to put together. They both require bait of some sorts to attract yellow jackets. Beekeepers with an interest in making their own traps can easily put them together. The two types of traps are the basin-meat bait yellow jacket trap, and the 2-liter bottle trap. Variants of the two traps may also be found in use by beekeepers in some regions. You can also use both types of traps together if you wish to.
The Basin-Meat Bait Yellow Jacket Trap
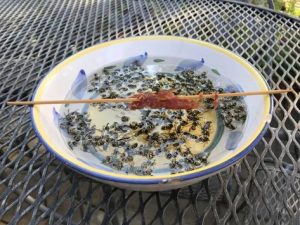
The first yellow jacket trap we’ll look at is the basin-meat bait trap. This trap makes use of a wide mouthed container and meat as its bait material. Any wide mouthed container is suitable for use in this trap. Wider mouths give more area to place bait and slow the formation of a life-raft by dead yellow jackets. The basin-meat bait yellow jacket trap uses soapy water to speed up the death of the insects caught in the trap. It puts to use the principle that a yellow jacket that is carrying a chunk of meat falls a few inches as it starts its flight back to the nest. In the few inches that it falls, the yellow jacket makes contact with water in this trap. It cannot fly away and and thus eventually dies.
Things you need
Setting up this yellow jacket trap requires you to have the following:
- Water.
- A wide-mouth container that can hold water. Refrigerator food containers can work if you do not have a suitably sized basin.
- Small wooden plank that can run across the mouth of your water container.
- Soap.
- Meat bait – fresh chicken meat is great for the job.
- A great location for your trap.
Steps
To make the Basin-Meat Bait yellow jacket trap, follow the steps below:
- Add water to your wide-mouth container.
- Add some small amount of soap into the water. This helps prevent wasps climbing out of the traps and speeds up their death. Any type of powder or liquid soap detergent works fine with this yellow jacket trap.
- Next, attach your fresh chicken meat bait to the wooden plank. A wire or some screws are enough for attaching the bait to the wooden plank.
Ensuring the trap works
The plank you use in this trap should be wide enough so the meat bait does not extend beyond the edges of the plank. When setting this trap, the wooden plank holding bait is placed at the top of your water container. If you do not have a wooden plank, improvise with any other suitable replacement such as a piece of metal with sufficient width. The bait faces downward towards the water in the container. A gap of approximately 1-inch is allowed between your meat bait and the soapy water in the container. This arrangement of the basin-meat bait yellow jacket trap makes yellow jackets drop into the water in the container.
You should check your basin-meat bait yellow jacket trap often. It can be very effective and kills many yellow jackets in a short span of time. Dead yellow jackets in the trap float at the top. When they accumulate, they form a life-raft for other yellow jackets. Be sure to remove accumulated yellow jackets from the floating mass to make space for other yellow jackets to drown.
The 2-Liter Bottle Yellow Jacket Trap

The second popular trap you can make is the 2-Liter Bottle yellow jacket trap. It makes use of a large 2-liter bottle and liquid bait. This trap is easy to make and place where it can trap yellow jackets. It can be hung on a string near your apiary or near the yellow jacket nest you have located. This trap can be made in two variations which are both effective at trapping and drowning yellow jackets.
One variant of the this yellow jacket trap requires you to make a hole in the side of the 2-liter bottle. This hole should be approximately ¾-inches wide and ¾-inches long. The other variant of this trap is where the neck of the bottle is cut and inverted into the bottle like a funnel. Yellow jackets go through the funnel and into the trap. They cannot get out after eating the bait, however honeybees entering the trap can escape just fine. In the variant where you make a hole in the side of the bottle, yellow jackets can get in but have a difficult time leaving the trap.
For your 2-liter bottle yellow jacket trap, you may use liquid bait. It is an important component of the trap. You may also add some meat into the liquid bait to make the bait more alluring to yellow jackets. The liquid bait used in this trap has sugar in it. It is diluted to make it not very attractive to honeybees but can attract yellow jackets.
Things you need
Liquid bait for this trap is made by mixing sugar, water, apple cider vinegar and some banana peels. It makes use of:
- ¼ cup of sugar
- 1 banana peel
- 4 cups of water
- 1 cup apple cider vinegar
- Razor knife
Steps
- Use the razor knife to cut off the neck of the bottle or to make a hole in the upper section of the bottle. If you decide to cut off the top part of the bottle, place it inverted into the bottle like a funnel.
- To prepare your bait mixture, combine the sugar, banana peel, water and vinegar in a bowl. Mix well. After preparation, you could give it a day to ferment or use it right away in the trap. You do not have to use all the prepared mixture at once in the bottle. Add just enough to lure yellow jackets and drown them. This is usually achieved by filling the bottle with the bait to about ¼ full.
- For increased effectiveness, add some meat to this trap. The best meat is chicken meat, but you can also use horse meat and ham without much loss of effectiveness. Remove decomposing pieces of meat from the trap. Yellow jackets do not eat meat that is not fresh.
Ensuring the trap works
This 2-liter bottle yellow jacket trap is more effective with the top quarter cut off and used like a funnel at the top of the bottle. It can be used repeatedly without having to rinse the bottle. Pour out the bait if it starts fermenting and stops attracting yellow jackets. You should also remove dead yellow jackets from the trap so they do not prevent other yellow jackets from drowning in the trap. A few of these traps placed around the apiary or near yellow jacket nests are enough to keep yellow jacket populations down.
How do the Two Traps Compare?
The basin-meat bait yellow jacket trap does not make use of sugary bait and as such has no chance of accidentally attracting honey bees. This is a great trap for use in beekeeping. It is also suitable for use around your home in yellow jacket season. The trap can be made using a container with a wide top. It catches many yellow jackets and lasts a longer before you need to remove dead yellow jackets. By having a wide top, the trap can catch many yellow jackets at a time.
The 2-liter bottle yellow jacket trap is easy to make and set. You can make several of the traps and set them in various locations around your apiary. The traps make use of bait that attracts yellow jackets. This trap is effective at trapping yellow jackets and keeping them in the trap until they die. Even with a life-raft of yellow jackets on the top of the liquid bait, the 2-liter bottle trap can still detain live yellow jackets. An advantage of this trap is that it can help you with some other insect predators of honey bees. They get attracted by the bait and get caught in the trap. Just make sure to get your liquid bait to the correct dilutions so it does not attract honey bees.
Placing your DIY Yellow Jacket Traps
Placing your DIY yellow jacket trap in the right place is very important. If placed wrong, the trap will not catch any yellow jackets. Traps are best situated near yellow jacket nests. That way, they attract and trap the yellow jackets without giving away the location of your beehives. If you cannot find the yellow jacket nest, place the traps in the outer perimeter of your apiary. Any yellow jackets flying in the area will get attracted to the traps.
The basin-meat bait yellow jacket trap can be placed on the ground. Make sure there are not many tall grasses or shrubs obstructing yellow jackets from flying into the trap. The ground should be flat to give the trap uniform distance from the bait to the water in the trap.
Yellow jacket traps on the ground are at risk of being tipped over by raccoons and other rodents that may want to eat the dead yellow jackets. For the 2-liter bottle yellow jacket trap, hanging is recommended. Suspend the trap 1-2 meters off the ground for best results. If you cannot suspend the trap, place it on flat ground where it will not tip over.
Conclusion
Use this guide on how to make a yellow jacket trap to keep your honey bees protected from possible invasions. Your choice of trap depends on the number of yellow jackets you see around, and the materials you can easily acquire. These traps are all effective to varying degrees but can all be used in an apiary to keep your bees safe and avoid losses. Remember that while an attack by yellow jackets lasts for a few hours, you may not see it on time to do anything. Prevention using yellow jacket population control is the surest way to make certain that your honey bee colony will not be invaded by the wasps.
What did you think of this DIY guide on making yellow jacket traps? Leave a comment below and let us know.
Great article
I’m not a bee keeper but I have a lot of hummingbirds and I don’t have much of a problem until August. As you said that’s when they come by. I have at all times between 10 and 12 feeders out and they consume about a gallon per day. I have quite a few that visit ea yr and have been for at least the past 10 yrs or so. I appreciate all I can learn about trapping the yellow jackets when they come out the hummingbirds won’t be even able to get near the feeders. One yr they chased… Read more »
I have the EXACT same issue and the hummingbirds won’t go near the feeders while the yellow jackets are there. I am afraid of harming the “good” bees. Is this safe for them?
I love that this article recommends that I use horse meat. I was wondering what I was going to do with all this spare horse meat I had sitting around. I sure am glad that I took the plunge and had my horses slaughtered so I can trap some yellowjackets.