
If you purchase an independently reviewed item through our site, we earn an affiliate commission. Read our affiliate disclosure.
The fulfilment of rearing your own bees and the financial reward that comes with it is something that you will cherish. For those who are already involved in the practice, they have sweet stories to tell about the rewards that are coming their way. Those who are involved in beekeeping can best talk about the efforts that they have put into the notch. There is what is referred to as the swarming of the bees, something every beekeeper will do all that is professionally possible to avoid. What you are expected to do so as to avoid it is to split the bee colony. Apart from preventing swarming, another benefit of splitting is the making of a new hive for a beginner to start his/her own apiary. If you are the adventurous type, you can begin the plans to start rearing your own queens. In this article, we’ll discuss how to make your own homemade Nuc beehive.
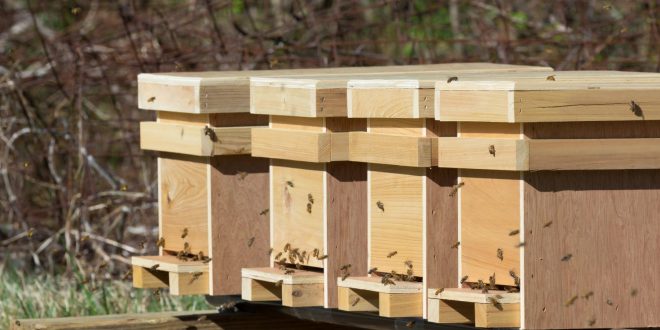
If for whatever reason you want to split your hive, you will need the expertise combined with the proper equipment to do that. The most important thing that you will need to carry out the process of splitting is the nucleus colony hive (often shortened to Nuc beehive). This is a smaller bee hive box that will make it easy for your bees to have a good start.
Making your Homemade Nuc Beehive
For most, the objective is to make a commercial success of your beekeeping journey. What you are about to read is a DIY project that will give you a sense of accomplishment when completed. The importance of making your own homemade Nuc beehive is underlined by the fact the ready-made hive can come at a huge cost to the pocket. If you have not budgeted for one, that should not mean a death blow on your passion for beekeeping.
With simple woodworking skills, you are good to go in your attempt to make your own homemade Nuc beehive that you will be proud of. All you are required to do is to simply follow the steps that shall be discussed below and you will definitely have a better understanding of what to do. Enjoy.
Materials You’ll Need
- 2 x 4-feet, ¾-inch thick plywood or similar type of wood
- Hand saw or table saw
- Measuring tape
- Nails or screws
- Hammer or screwdriver
- Drill
The Wood Cutting Process
Wood is an important raw material that you will need to achieve your end goal. There is a need to use wood that will not repel the bees. It is best to get the right type of wood (such as those in which bees make their home in the wild) as it will definitely make your bees happy. After you have gotten the right type of wood, you have to be prepared for the process of wood cutting.
If you are a first-timer, you may not find this bit of the process easy. However, the fact that you have a target in mind, which is to achieve a homemade Nuc beehive that you can call your own, should be strong enough to keep you going. It’s good to learn to do things for yourself and you should never be afraid of failing. After the first two attempts, you’ll probably get more acquainted with it.
Read on below as we discuss the steps that will take you from zero to the completion of your homemade Nuc beehive.
Step 1: Cutting the Wood
This step is the most time-consuming of all the steps. If you are a newbie, you have to be prepared for a raw deal at this stage. You are required to lay out a 2 x 4-foot piece of plywood. You can use a ¾ inch-thick plywood to achieve the best results. If you try ½ inch thick, you are going to discover that it will not hold up at the joints. As was advised above, you will be required to spend extra to get the best wood that your bees will naturally gravitate towards. For the best results, we shall take a look at the dimensions of the different pieces. The list is as follows:
- Front Walls x 2 – 7 ½ x 9 ½ inches (you are expected to get three from the cutouts)
- Front Tops x 2 – 9 x 2 ½ inches (they are needed as the handles of the box)
- Side Walls x 2 – 10 ½ x 19 ¾ inches
- 1 Top – 9 x 22 ¾ inches
- 1 Bottom – 9 x 24 inches (this dimension is for those that like longer landing areas; if your take is for the shorter landing areas, then the dimension can be shorter).
Note: You are required to use a measuring tape and saw to accurately measure and cut the different sizes of wood outlined above.
You will definitely spend more time here; once you are done, your assembly will begin in earnest and the process becomes faster. There will be no more cutting or routing or anything else! You can now speed up the process.
Step 2: Adding the Sides to the Nuc Beehive
Putting the box together can be done in several ways. However, in whichever way that you want to go, everything boils down to the use of nails and screws. Of the two options, the easier of the two would be the nails. The problem with nails however is that they are not as long-lasting. If you choose to use screws, you will find it much more tasking, but it will last you longer because it is more durable than the use of nails.
To get something more compact, it is advised that you use screws. You are expected to drive them into the side of the wood at one end. For the most effective results, you are advised to first drill a pilot hole into the box before putting in the screws. The idea behind this is to keep your wood in one good piece. It will prevent the wood from having any cracks. That is the best way of getting an effective result if you choose to use screws.
Depending on your eventual choice, it is advisable to drive the nail or the screws properly into the wood. Never make the mistake of leaving a pointed nail or screw sticking out of the wood. Ensure that the nails are properly rammed in and the screws are made flat – inline with the surface of the wood.
There is a logic behind ensuring that you do it properly in that fashion; it has nothing to do with the welfare of your bees, rather it is a security measure to take care of you the beekeeper. Imagine your jacket getting stuck with a protruding nail or screw? There will be an immediate attraction to you from the bees; they will swarm in your direction. The implication is that you will get some nasty bee stings! So, beware that you do not leave any protruding nail or screw as the case may be out of the box.
The step we are talking about now will be a lot easier if you have the benefits of a third arm. The task at this stage is to attach the sides to the outside edges of the front as well as the back of the box. Your homemade Nuc beehive should be wide enough to accommodate the five frames that you will need in your box.
Talking about the number of screws or nails to be used at each end, it is advised that you use a number of any of the two that you feel will give you the best that you need for a good box. However it is advised that you use not more than two. First, you have to think about the safety of the edges of the box because if the pressure from the end is too much, it will split the wood. It is recommended that you use not more than two screws at each end. If you want to go on and apply the third, you are to watch out that you do not apply much pressure on the wood so that you will not end up destroying what you have built all this while.
Step 3: Adding the Handles to the Nuc Beehive
Still with us? Good. This is an aspect that you are probably going to like. The concept of the handle serves a dual purpose: using it to lift the hive box as well as being the ledge that the frames will rest on. It’s up to you to decide on the design that you are going to use among the several options available. Some of them are technical and you will need the use routers or some other fancy techniques to set it up. However, there are some that are much easier and you are strongly advised to go for any of such options that you find more convenient. You will be required to take the smallest pieces of the cutout and then place them on the front. It has to be flush with the top of the sides. Make sure it overlaps slightly with the front panel; it should sit flush with the outside of your side walls.
- All you need to get the handle in place is just one screw/nail on each side of the handle. If you desire to make assurances doubly sure, you might add yet another screw on each side as well just to give you a warm and fuzzy feeling. Note however that just one screw is enough to do the trick.
- When done, test the fitness of the handle by flipping the box over repeatedly. Do the same for the back handle as well as the ledge.
Step 4: Attaching the Bottom Board
This is one step that you can skip. Tactically, this is an optional step that you can as well do away with. However, it should be noted that your bees will not mind if you provide them with a floor. If your desire is to make a second story to a Nuc beehive that you already had in the process, then you will not need this bottom board at all. What you will get will simply sit on top of your current Nuc beehive. In this scenario, you will simply have many boxes stacked on top of each other.
- In the event that you opt to have the bottom in place, you will be required to flip the box open and then proceed to add the bottom by laying the bottom of the board on it. It will be left at your discretion which end you want to choose as the front.
- There will appear an extra length of the bottom board; you are to allow it to hang over on the front end. At the end of the exercise, it will act as the landing ground for the bees.
- Going back to the screw again, you will be required to screw this into the box. If you will go by our expert tips here, just one screw will do. You will need two at the sides of the box. There are challenges here to be handled in a professional manner if you do not want to ruin your efforts. If you attempt to screw on the front, experience shows that you may end up ruining your drill bits during the next step that will follow.
- You are advised to pass the screw through the center of the front, you will succeed in drilling the entrance hole, which will be gotten right through your screw. You will feel a sense of disappointment when you see your bits all chewed up. From the different experiments on the procedure, it was discovered that it will not really help to have a screw on the front.
Step 5: Drilling the Holes
The bees will need an entrance to make their entry into the hive easy. You are expected to provide something that the bees will be comfortable with if you truly want to achieve results. The location as well as the size of your entrance matters if you want to achieve the desired success. If you ask around, you’ll soon realize that different beekeepers have their preferred size for the hive entrance. Our preferred hive entrance size is 3/8 of an inch. This is because:
- The 3/8-inch passageway gives the bees plenty of room to facilitate both entry and exit movements.
- The size serves as a security measure. The small size is a strong defense against the attack of pests as well as robber bees that may want to invade the colony of your bees.
- If you want cool privacy for your bees, then this size in question will provide that for you. There will be no outside interference from rodents because they will find the size of the hole too small to gain entry. most rodents have trouble getting through a hole that small when seeking shelter. What you need is a size that will make room for your bees; you will get that through a hole that is not too ambiguous; one that will prevent outside interference.
Placement of the Entrance
Another key area that you have to take extra care of after settling the issue of the size of the door, is the placement of the entrance door for the bees. For a successful and profitable experience in this notch, the positioning of the door must be one that will give you the desired results. There are instances of people who leave as much as an inch between the bottom board and the hole. You are expected to note that the majority of the plans do come with a solid bottom board that will not accommodate any form of water drainage. You need to be extra careful in doing this if you are not to end up with an inch of bee soup at the bottom of your hive instead of honey.
It is preferred to put the front entrance as close as possible to the bottom board itself. Doing this will ensure adequate drainage. You can then put the rear entrance at an inch or so which is located under the rear handle. This is done for safety reasons, in the event that you are moving the hive box. During the course of the movement, a handful of bees might have decided to hang out at the back of the porch. You need to protect yourself from possible attacks from the bees. Furthermore, it is best that you drill both openings. The objective of this is to provide much better ventilation for your bees inside the Nuc beehive.
Step 6: Make the Lid
Having gone this far, you are at the closing stage of your homemade Nuc beehive. You began with the most difficult part of the job and now you will be capping it up with the easiest part of the design. The lid is very important because you have to give a protective cover for the bees inside the hive. What you are required to do here is to simply take the last remaining piece – screw two pieces of scrap which you got from the cutting step unto the ends of the top piece. When done, you will have your lid perfectly in place.
Fitting Test
It is important to note that you have to carry out a fitting test before you proceed to screw the scrap in. There are several people who have fallen victim to that mistake, therefore, you are hereby forewarned to carry out a fitting test of the lid cover. This is a good sanity test to ensure that the dimensions are perfect before you begin to screw things up so as to avoid the embarrassment of having to go over the process again when the cover refuses to fit in.
Remember we said this last step is the easiest of them all; if you are going to get it straight on the first attempt, then you must follow the tips that we have so far, if you do not want to follow the path of wasting your time to repeat this simple process. Make assurances doubly sure that the lid will fit in perfectly before you ever proceed to put the screws into place.
Bonus Step: Catching bees!
Having gone through the process of making the Nuc box, you will by now have invested so much into the project and at this stage, you are expected to move on to the action stage of the exercise, which is to kick-start the returns on your investment. It will be a waste of time if you leave your box empty. What you are expected to do at this stage is to go out and find your own swarm.
If you want to make a huge success of this, then you are advised to contact your local beekeeping club. They will be of valuable help in getting you some little critters that will make your box their preferred home.
Conclusion
DIY projects are not for everyone, but if you are so inclined and good with your hands, then can be fun to try and will even save you in the long run. Knowing how to make your own homemade Nuc beehive is a useful skill that can come in handy. If you follow and do everything in accordance with the steps outlined above; you will definitely make a huge success in your beekeeping experience.
What are your thoughts on this DIY guide? Leave a comment below and let us know.
It is a blessing to have you guys thank you a lot
Thank you, that means a lot!