
If you purchase an independently reviewed item through our site, we earn an affiliate commission. Read our affiliate disclosure.
Beehive frame assembly is important for hands-on beekeepers with an interest in making their own beekeeping equipment. The next logical step after building your own beehive boxes is to assemble the frames and install them. This guide takes you through assembling beehive frames for both brood and honey super beehive boxes. It covers frames for deep, medium and shallow beehive boxes.
The assembly of beehive frames can be split into two broad processes:
- First is the assembly of the wooden frame.
- The second broad process is wiring the frame and the addition of foundation including embedding wax foundation.
About this Guide
Beekeepers use two main types of beehive frames: wooden and plastic. This guide covers the assembly of wooden frames. Plastic frames come mostly ready to use with foundations already added to them. You may choose to add wax to the plastic foundation on plastic frames to make the frame easily accepted by bees.
Beehive Box Sizes
The various beehive box sizes have different depths that also affect the height of the beehive frames that go into them. Deep beehive boxes are great for honeybee brood. Shallow and medium beehive boxes are best for use as honey super boxes. As such, deep beehive frames that you assemble are best suited for brood boxes, while shallow and medium frames are for honey super boxes.
How to Assemble Wooden Beehive Frames
Assembling wooden beehive frames starts with putting together the outer wooden parts of the frames.
Materials
You will need the following tools for the job:
- A hammer
- Small nails
- Some glue is also useful to add strength to the frame
- A strong razor blade with a handle
- Paper towels
- A carpenter’s square
The nails you use in beehive frame assembly are best if they are 1-¼ inch nails.
Beehive Frame Assembly Process
Lay out your equipment and tools on a suitable working surface with ample space. You should also have a rack or empty beehive box to hold finished frames. When assembling many frames, make sure to have all the pieces ready and waiting: top bars, bottom bars and sidebars.
Part 1
- Using the razor blade, cut off slivers of wood from the wooden pieces of your frame. Do this for all the pieces before proceeding to the next steps.
- Once the pieces of your frames are clean, use the razor blade to pry out the wedge cleat from the top bars. Be gentle when doing this to avoid cutting the top bar or the wedge cleat. Run the razor blade along the top bar’s groove to remove the wedge cleat with ease. You may remove the wedge cleats from all your top bars so you do not keep coming back to this step in the process.
- After removing the wedge cleat, use the razor blade to clean the wedge and top bar again. Any left-over wood slivers and pieces in the wedge cleat groove should be removed in this step. Set aside your wedge cleats for later use.
Part 2
- Use some glue on the upper groove of the sidebar for one beehive frame. This is the grove on the sidebar’s thicker section. As you get used to assembling frames, you will get good at applying just the right amount of glue.
- Take one top bar and fit it into the sidebar groove where you applied some wood glue. Make sure to push down the top bar into the groove tightly. The wedge cleat groove on the top bar should be on the inside when you are fitting the top bar into the sidebar.
- Glue the top bar and the second sidebar together in the same way you did the first sidebar. Turn the 3-sided partially assembled frame upside down and apply some glue to the grooves on the bottom side. This is the narrower section of the sidebars.
- Take one bottom bar and fit it into the grooves on your two sidebars. The groove on the bottom bar should be in the inside. Make sure the bottom bar fits snugly into the grooves on the sidebars.
- Using a paper towel or clean waste cloth, wipe off any excess glue that may have leaked out of the joints on your partially assembled beehive frame. It is now time to nail the frame together. You should not wait for the glue to dry before you have nailed together all the frame’s wooden pieces.
Part 3
- A single beehive frame takes not less than 10 nails for the best strength of the joints. Four nails are used on the bottom, four on the top, and one nail into each side of your beehive frame
- Hammer a single nail into each bottom end of your frame so it goes through the bottom board and into the respective sidebar. Check if the frame joints are square after nailing in each nail. If the frame is not square, gently muscle the joints into place until they are square.
- Hammer an additional nail into each of the ends in the bottom bar of the frame. This brings the total number of nails hammered into the bottom bars to 4.
- Flip the partially nailed frame over and hammer a nail into each end of the top bars. The nails should go through the top bar and into the respective sidebar.
- Check for square 900 angles in the top joints and muscle them gently into place if necessary. If the joints are square, hammer an additional nail into each end of the top bar.
- Beehive frame top bars have a thick and narrow edge on their inner part. Hammer a nail into your sidebar near the top. The nail should go through the sidebar and into the thick section of the top bar. This is done on both sidebars. This will help your beehive frame last longer without the side and top bars separating.
Things to note:
Glueing and nailing frames together should be done in sequence for each frame. It is not advisable to allow the glue to dry before nailing the frame. After nailing the frame, place it on a flat surface where it does not bear any weight or load and wait for the glue to dry. With many frames, empty beehive boxes are great for holding finished frames until the glue on them dries. A wiring jig is useful for beekeepers with many frames to assemble. It allows you to assemble many beehive frames at once.
How to Install Wax Foundation in Beehive Frames
After assembling your beehive frames through their first stage, it is time to add foundation. This is only important for beekeepers that use foundation in their beekeeping. Frames placed in a beehive will be used by honeybees anyway. The use of foundation in beehive frames helps bees start building honeycombs quickly, reduces the chances of cross comb and helps produce honeybees of a size predetermined by the beekeeper. Additionally, using foundation helps bees build a straight comb that does not spill onto the frame or sides of the beehive box.
Wax vs Plastic Foundation
Beekeepers use two types of foundation on wooden beehive frames – wax and plastic. Both types have their similarities, advantages, differences and disadvantages. The use of wax foundation allows beekeepers to be fully natural in their beekeeping operations. However, the wax foundation has a higher probability of breaking when subjected to centrifugal forces in honey extraction. The wax foundation also requires embedding which is not required for plastic foundation.
Installing wax foundation requires extra steps in the preparation of beehive frames. Wax foundation is weaker than plastic foundation and so needs additional strengthening. This starts with wiring the frame.
Materials
You will need the following equipment and materials:
- An assembled frame
- Eyelets
- Beehive frame wire
- An eyelet punch
- A needle nose or crimper or lineman’s pliers
- A hammer
- A number of 5/8-inch nails
Wax Foundation Installation Process
Part 1 – Wiring the Frame
- Lay out the tools in a manner that leaves them easy to see, reach, grip and use. Nail the eyelets into the sides of the frame using an eyelet punch. They prevent your frame wire from digging into the frame wood. A deep frame should end up with 4 eyelets on each side of the frame. You may make holes using a suitably sized nail or small size drill bit for the eyelets. Make sure the eyelets are in the general middle or centerline of the sidebar.
- Partially hammer one 5/8-inch nail into the top bar near the other nails used to join the top bar and the sidebar. Next, on the same side, partially hammer another nail into the bottom bar near the nails used to hold the frame bottom and sidebars together.
- Pass your frame wire through the eyelets in the sidebars of the frame. Start by passing the wire through one upper eyelet in the side where you partially hammered in the nails. The wire should run across the frame to the eyelet on the opposite sidebar, down that sidebar and through the next eyelet. It then moves to the first sidebar and down that sidebar to the next eyelet. Repeat this until the wire is through all eyelets.
- Loop the wire around the nail a few times on one end of the beehive frame and hammer in the nail completely. The loop should rest securely against or on the side of the frame. Break any excess wire at the hammered-in nail by moving it back and forth.
- Pull the wire using your crimping tool or pliers and pull it tight. Loop it tightly around the second nail so it stays in place. You may cut off excess wire. Turn the nail in a circle so it tightens the wire further. A properly tightened frame wire makes a pinging sound when you pluck it. When sufficiently tight, hammer the second nail fully into the frame.
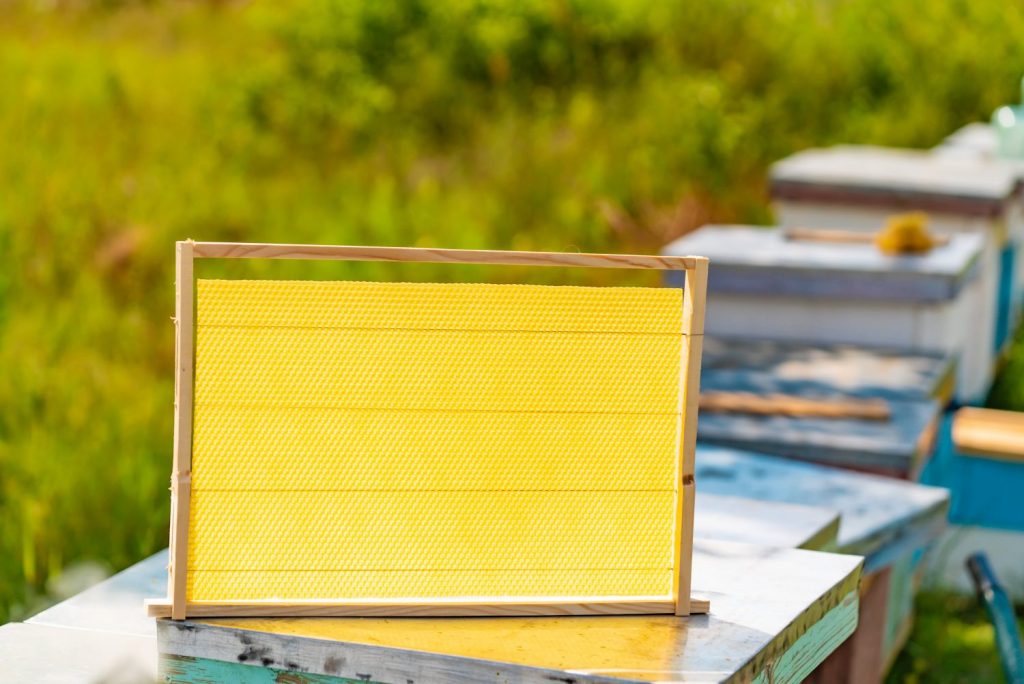
Part 2 – Embedding the Foundation
After wiring your frame, you only need to lay the wax foundation on it and embed the foundation. The wax foundation is rather fragile and can break easily. If you pass the foundation between the wires of your frame, be gentle. The foundation comes in sheets of wax already formed into honeycomb cells pattern. Bees build their honeycomb following the already established pattern and size of the cells.
Embedders can be used, or you can heat the wire and gently press the foundation into the wire. Wire embedders may be hot or cold. Popular embedders loved by beekeepers are spur embedders. They feature wheels with a groove and heating that makes the job easy and fast. Spur embedders are built in the style of a soldering iron. Internally heated embedders that you plug into a power outlet are great for the job.
To embed wire using a spur embedder, run the embedder along the frame wire while pressing the wire into the wax.
Heating frame wire directly for embedding purposes is possible. Beekeepers use gadgets that output 12 Volts or 24 Volts. The 12 Volts power output gives gradual heating while 24 Volts results in fast heating. Electric embedders are fast and may run on DC or AC power.
It is best to embed the wire into the wax foundation in a heated room. Take care not to overheat embedding tools or frame wire until they melt your wax foundation. The foundation should run from the bottom bar to the top bar. Grooves in the top and bottom bars of beehive frames guide you on how deep into the frame the foundation should be. For wax foundation, you may use the top bar wedge cleat or not. The cleat holds foundation in place on the top bar.
How to Install Plastic Foundation in Beehive Frames
A plastic foundation is a sheet of plastic that is used as a base for honeybees to build their honeycomb. It fits into the grooves on the top and bottom bars. The plastic foundation does not require beekeepers to wire their frames. Heat embedding the wire into a plastic foundation damages the foundation, so it should not be attempted.
Some manufacturers of beehive frames also make plastic beehive frames. The frames can be continuous with foundation in the case of plastic foundation. All plastic foundations should be coated with a generous layer of beeswax as it helps bees take to the foundation faster.
The plastic foundation is strong and does not break easily during honey harvesting. It comes in plates that you slide into the beehive frame after assembly. Simply insert the foundation in the frame and you are ready to go.
When installing plastic foundation, make sure it enters the grooves in the top and bottom bar. You should also make sure to insert the wedge cleat of the top bar into its groove to hold the plastic foundation in place.
Should You Use Plastic Foundation?
Honeybees have a natural preference for natural materials. These are mainly wood, wax and propolis. The use of plastic foundation is not looked at favorably by some beekeepers. If they must use foundation, naturalist beekeepers prefer to use wax foundation. Plastic is a synthetic material which is derived from petroleum processing. It is not only environment-unfriendly, but bees do not work with plastic.
It is important for beekeepers using plastic foundation and other plastic components in their beekeeping, to make sure that the plastic is food safe. Honey is primarily produced for human consumption and must be safe. Additionally, foundation may contain contaminants that the beekeeper is not aware of. This is especially true with wax foundation that is produced elsewhere and sold to beekeepers for use in their beehives. For sureness that foundation is free of contaminants, it is best that beekeepers produce their own wax foundation by allowing bees to build comb on fresh beehive frames.
Foundation vs Foundationless Beekeeping
The use of foundation in beekeeping has some disadvantages that beekeepers should be aware of. The most important of these is that foundation causes bees of one uniform size to be bred when used in brood frames. Naturally, bees in a beehive have different sizes for workers, the queen bee and drones. With foundation, the size difference between these bee types is not realized. As a result, some pests and predators find it easier to attack bees or thrive in a honeybee colony. Foundation is also not very suitable for beekeepers who aim to harvest wax as one of their beehive products. With foundation, harvesting the wax is either not feasible or results in small blocks of wax instead of large sheets.
Beekeepers that are naturalists or aiming to sell off package bees have to go foundationless. Additionally, the experience levels of individual beekeepers play a major role in the adoption of foundation in apiaries. Beekeepers who are experienced can harvest honey from foundationless beehive frames without breaking the honeycomb. They do not need foundation for its ability to help keep honeycomb intact during honey harvesting.
Conclusion
Beehive frame assembly is a simple process with adequate preparation. Sound knowledge about assembling beehive frames enables the beekeeper to build strong and durable frames. Complete beehive frames have foundation on them for beekeepers that use foundation frames. Use this guide on beehive frame assembly to make great beehive frames that you will be proud of and which will work great for your honeybee colony.
What are your thoughts on this DIY guide? Leave a comment below and let us know.
This was very helpful, Michael, and answered many of my questions.
You are most welcome!
Yes, I have frames that don’t have the removable cleats and yours is the first site to explain how my kind of frames work. Thanks!
[…] smooth wooden frame and confirming it matches the wax foundation size. This setup also promotes natural bee behavior by ensuring stable, clean frames that bees can work with. This step emphasizes foundation […]